9 steps towards better landscape photos
There are snapshots that you can take on your mobile phone – and then there are great shots: the ones that you’ll want to frame and showcase online. These are my tips for capturing the ones you’ll want to add to your portfolio.
1. Check the weather forecast before you go out.
A great landscape shot requires an interesting sky. From a photographic perspective, milky grey cloud – of the sort that accompanies drizzle or rain – is boring. That said, the few brief minutes after heavy rain finishes can be a very good time to take landscapes because the cloud looks smoky and interesting. Cloudless blue skies are also uninteresting; if you’re favoured by them, go out and enjoy the sun on your face (such days are all too rare in England) and don’t worry about taking serious photos.
2. Take your camera out at the right time of day.
Photographers talk about the ‘golden hours’ around sunrise and sunset for good reason: when the sun is low in the sky, haze softens its light and features in the landscape cast long shadows. These immediately make your subject look more appealing than if captured in the middle of the day, when the light is either very harsh beneath the midday sun or completely diffused by nondescript hazy cloud.
3. Check where the sun is going to rise and set.
Smartphone apps like The Photographer’s Ephemeris are a very good way to work out the optimum time of year to photograph, for example, the sun rising behind a particular peak or, in the case of ‘Manhattanhenge’, setting along one of New York’s concrete canyons.
4. Take the right gear with you.
If you’re photographing landscapes when the sun is low in the sky, as well as your camera, you will definitely need a tripod. It simply needs to prevent camera shake when you take the photo and doesn’t need to be expensive if you’re starting out.
Whilst any point’n’shoot camera with a self-timer that screws into a tripod will do the job, for better results you need to invest slightly more in a camera that shoots uncompressed ‘RAW’ files as well as JPG files. Raw files (Raw isn’t actually an acronym) are to JPGs what dough is to bread. Just as dough can be kneaded into any shape you like before you bake it in the oven, raw image files can be enhanced – ‘post-processed’ – using software such as Adobe Lightroom before export to JPG to a far greater extent than JPGs created in-camera.
Ideally, your camera will be a DSLR (digital single-lens reflex) camera that enables you to change lenses in future; better quality glass in front of your camera’s sensor is a better way to improve image quality than buying a new camera body equipped with a basic ‘kit lens’.
Further accessories in which you could invest for landscape photography are neutral density (ND filters) and remote shutter releases. Varying in strength, ND filters reduce the amount of light hitting your cameras and enable you to increase the length of your exposures, blurring skies and water to create pleasingly dreamy effects. Wired or remote-control shutter releases enable you to take very long exposures without inadvertantly shaking the camera when operating the shutter by pressing a start/stop button on a handset away from the camera body.
5. Stand in front of an interesting view
Any view worth photographing comprises a good sky as the backdrop, interesting detail on the horizon – mountains or hills, say – and foreground elements that lead the eye towards the centre of it it, be it a river, road, railway,hedge, furrow or simply a rock or two. If these elements lead you in an S-shaped curve towards it, such as in the photo below, so much the better.
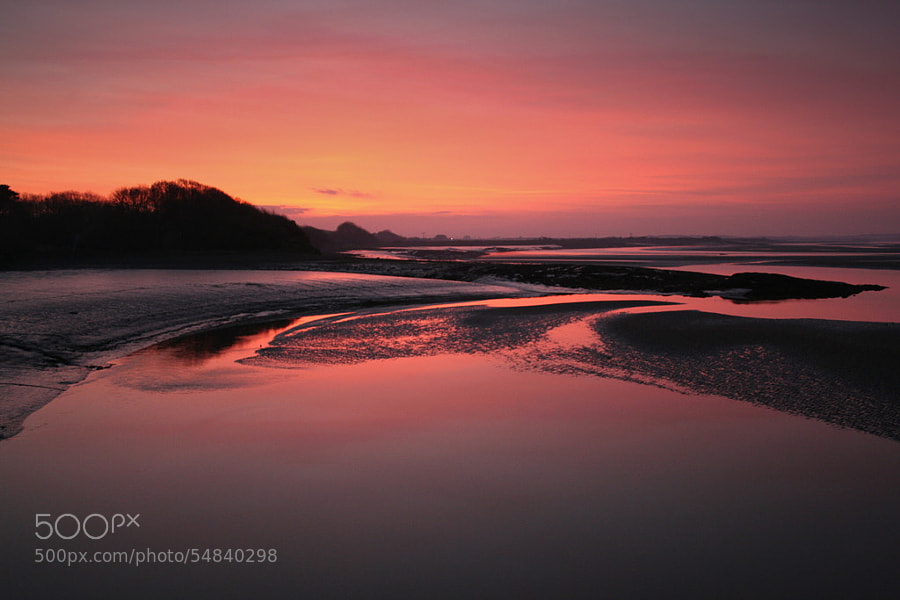
Winter sunset
Landscapes that don’t work so well are those which lack interest, such as flat, empty fields, large expanses of water or empty deserts. Maps are a good way of identifying potential locations; you can also take a look at sites like 500px.com/map or panoramio.com to find places from which other photographers have taken great shots.
6. Better still, crouch or lie flat
A dog’s eye view of the world lends greater prominence to the foreground and thus increases the depth of field in the image. A very simple technique that can be used by anybody, it is missed by so many casual phototgraphers.
7. Frame your shot carefully
Many novice photographers make the mistake of placing a tree, say, and the horizon dead centre in the frame. It is far better to follow the ‘rule of thirds’ and move position so that the tree appears in the lower left-hand third of the frame and the horizon traces a line across the upper third.
8. Keep it simple
Avoid distracting elements, such as tree branches intruding into the top and sides of the frame, by focusing in tighter or moving to a different position. It’s always good practice to look around the perimeter of the frame before pressing the shutter.
9. Expose for the highlights
DSLRs and many compact cameras nowadays include histogram displays on the rear screen that illustrate the spread of tones, from dark to light, in the image captured. Take a test shot and, if it shows clipped highlights (pure white), dial in negative exposure compensation to darken the overall image and ensure that tones other than pure white are captured across the image. By shooting raw files, you can restore the correct exposure, whilst retaining detail that would otherwise have been blown out in bright areas, during post-processing.
Conclusion
Taking the right gear to a good location under broken skies early or late in the day will maximse your chances of capturing some memorable shots. Your next step should be to use the alchemy of post-processing to turn the rather flat raw image that comes out of your camera into the golden landscape that you saw in your mind’s eye.
Vasil Ivanov / January 27, 2015 /
Very nice article.